
Putting up a new fence–especially one that runs between your yard and a neighbor's–can quickly shift from a simple upgrade to a delicate negotiation. Replacing a worn-out structure or installing a fence for the first time calls for everyone involved to be on the same page. Clear planning helps prevent confusion, tension, and unwanted drama.
This guide offers practical steps for managing fence-building projects that involve a neighboring property.
Key Takeaways
- Always check property lines before planning a shared fence.
- Open communication with your neighbor is essential.
- Discuss and agree on design, material, and cost.
- Understand local laws and HOA rules before installation.
- Offer to handle the logistics if your neighbor is reluctant.
Step 1: Confirm the Property Line
Every successful fence project starts with a clear understanding of boundaries. Misplaced fences can lead to legal trouble, disputes, and the costly hassle of tearing down and rebuilding. Before discussing styles or costs, it's essential to know exactly where your property ends and your neighbor's begins.
Before you talk about cost or style, make sure you know where the actual property line is. You can't legally place a fence on your neighbor's land without permission.
How to Verify:
- Review your land survey plat or property survey.
- A map with official property lines can often be found in your local county records as well.
- If unsure, hire a professional surveyor. The average cost is often about $500, depending on your area.
Step 2: Start the Conversation Early
Communication is everything when dealing with shared property matters. A friendly, upfront conversation is often all it takes to build alignment–or at least avoid a misunderstanding. Even if you think your neighbor may object, it’s better to be proactive and respectful from the start. You might be surprised at how collaborative they’re willing to be when they’re consulted early and have a fair voice in the decision-making.
Once you're confident about where the fence will go, talk to your neighbor before making any decisions.
Be Clear About:
- Why you want the fence.
- Where will it be located.
- That you're interested in splitting the cost fairly.
Use a friendly tone and discuss the potential benefits for both your properties (more security and/or privacy, better aesthetic, potentially higher property value, etc). This isn't just a courtesy–it's critical to getting them to cooperate.
Step 3: Decide How to Split the Cost
Money conversations can get awkward, but they’re critical in this case. The goal is to find a split that feels fair to both parties. A good rule of thumb is to factor in who benefits most, who’s requesting the fence, and whether there are any financial limitations. Remember, fairness doesn’t always mean 50/50–it means a solution that works for both households.
A 50/50 split is the most common and simplest option. But not every situation is equal.
Options to Consider:
- 50/50 Split: Equal investment for a shared benefit.
- 60/40 or 70/30 Split: If one homeowner insists on more expensive materials; if you suspect an insurmountable income gap between households; if one homeowner really pushes for either the “inside” or “prettier” side of the fence..
- Convenience vs Cost: If your neighbor is hard to convince or you can’t afford to pay the proportion they desire, offer to handle all the logistics (permits, hiring, scheduling installation) in exchange for a full 50/50 financial split. You're donating your time and labor to compensate for the additional amount they wanted.
According to HomeGuide, the average cost of a new fence ranges between $20 to $60 per linear foot, depending on the material. Weatherables® has high-quality, durable vinyl privacy fencing starting on the lower end of this scale, which will outlast any wood fence.
Step 4: Choose the Fence Together
Now comes the creative part. Choosing a fence involves aesthetics, durability, and even neighborhood norms. Whether you’re prioritizing curb appeal or low maintenance, it’s best to make the decision together. Walk the property with your neighbor, look at samples, and browse style ideas. Shared input leads to shared satisfaction.
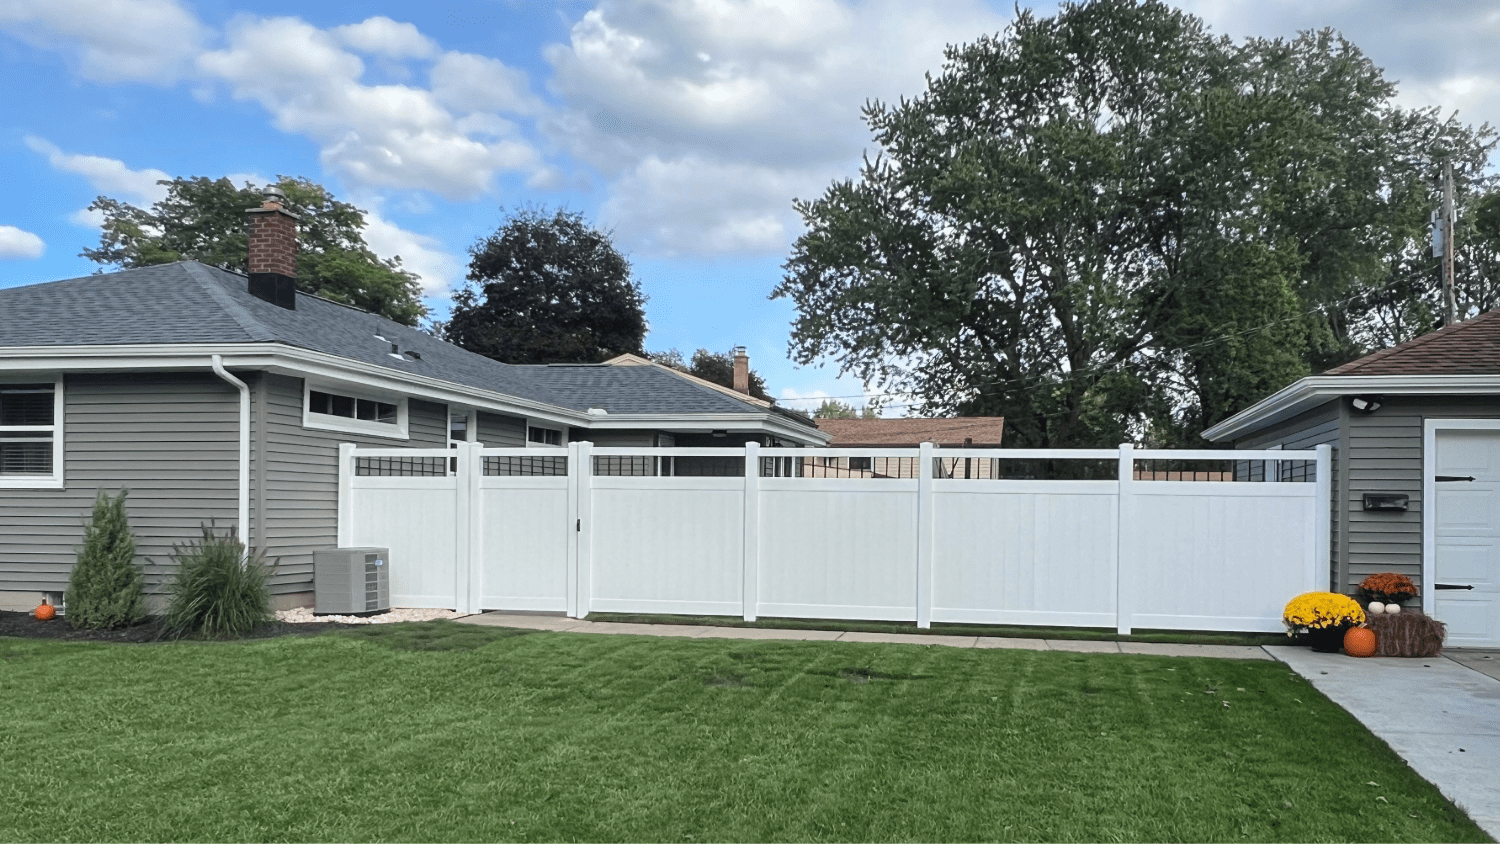
A shared fence means shared decisions. If aluminum is preferred over vinyl, options such as ornamental aluminum fencing provide both durability and a refined appearance.
Discuss:
- Material: Vinyl, wood, aluminum, etc.
- Style: Picket, privacy, semi-private, etc.
- Color and height
- Durability and warranty
Weatherables® offers vinyl fences that are up to 5x stronger than wood and require less maintenance–this might be a good selling point for a reluctant neighbor.
Step 5: Decide Which Way the Fence Faces
Though it might seem trivial, the direction your fence faces can spark debate. The industry standard is to have the polished, finished side facing out–but that doesn’t mean it’s a hard rule. Some communities even have regulations about fence orientation. Talk it over and choose a solution that looks good and feels fair.
Yes, it matters.
Common Practice:
- The "finished" or smooth side usually faces outward, toward neighbors or the street.
- The side with posts or rails usually faces inward.
You can get around this with good neighbor fences, which look the same on both sides.
Step 6: Check Local Laws and HOA Rules
What you can do on your property isn’t always up to you alone. Municipalities and homeowners' associations often have specific regulations regarding fencing. These can cover everything from height and placement to color and style. Failing to comply could mean fines–or worse, removal. Save time and stress by doing this homework upfront.
Even if you and your neighbor agree, your municipality might not.
Check For:
- Height restrictions (usually 6 feet for backyard fences)
- Permit requirements
- HOA regulations (if applicable)
Penalties for breaking fencing codes can include fines and forced removal, so check with your local zoning office. If you’re hiring a local fence installer they should be familiar with local regulations, although HOA restrictions are typically the homeowners’ responsibility.
Step 7: Handle the Details (Optional, But Smart)
Taking the reins on planning can be a powerful goodwill gesture. If your neighbor is lukewarm about the project, offer to handle everything from quotes to installation logistics. For many, the hassle of coordinating is more off-putting than the cost. Making it easy could make the difference between a 'yes' and a 'no'.
If your neighbor is hesitant, offer to take care of the legwork:
Take On:
- Getting estimates
- Coordinating with contractors
- Scheduling installation
- Managing permits
Doing the administrator’s work makes it easier for your neighbor to say yes, especially if they’re busy or uninterested.
Step 8: Put the Agreement in Writing
Even between friendly neighbors, a written agreement prevents memory gaps and misunderstandings. It doesn't need to be a complex contract–just a basic document stating who’s paying what, the agreed-upon style, and an expected timeline. If a document feels too formal, simply put this information in a “recap email” to your neighbor and ask them to confirm they agree (via email). They’ll likely appreciate having these details handy as the project progresses.
If anything changes, update the agreement or email thread. It’s all about transparency and accountability. A simple one-page document or email that outlines cost split, chosen fence style & timeline can keep miscommunication at bay. This isn’t about mistrust–it’s just thoughtful planning. Be sure to keep any receipts related to the project.
Step 9: What If They Say No?
Not every neighbor will want to pitch in–and that’s okay. If you've done your due diligence and tried to compromise, you still have the option to proceed on your own. Just make sure you build entirely on your side of the line and stay within code. While it may be more expensive, it gives you total control over the outcome.
Not every neighbor is cooperative.
If they decline:
- Build just inside your property line so it's clearly yours.
- Pay 100% of the cost, but choose the fence you want.
- Be mindful of aesthetics; a good-looking fence still benefits the neighborhood.
Most states do not allow you to force a neighbor to split the cost unless there is an existing shared fence that needs to be replaced, and splitting is legally required.
Fences can add privacy, security, and curb appeal–but only if done right. Clear communication, mutual respect, and proactive planning are the keys to splitting a fence with your neighbor with minimal drama or conflict. A little effort up front can save a lot of awkwardness — and even a neighborly relationship — later.
Looking for a durable, low-maintenance option both you and your neighbor can agree on? Check out Weatherables®' premium vinyl fences–built to last, made in the USA, and designed for long-term satisfaction.


